katiejeancooks

Real Food For Families

Running With Scissors

I am one of those neurotic moms who baby proofed our home about a month before our first child was born. Before Katie had even thought about rolling over, much less walking to the knife drawer and helping herself, I had every sharp object in our house hidden high above the stratosphere. I regularly scolded my husband if he so much as left a butter knife close to the edge of a counter and I dreaded the day when my kids would learn to climb up onto a chair in order to reach the previously safe “stratosphere”.

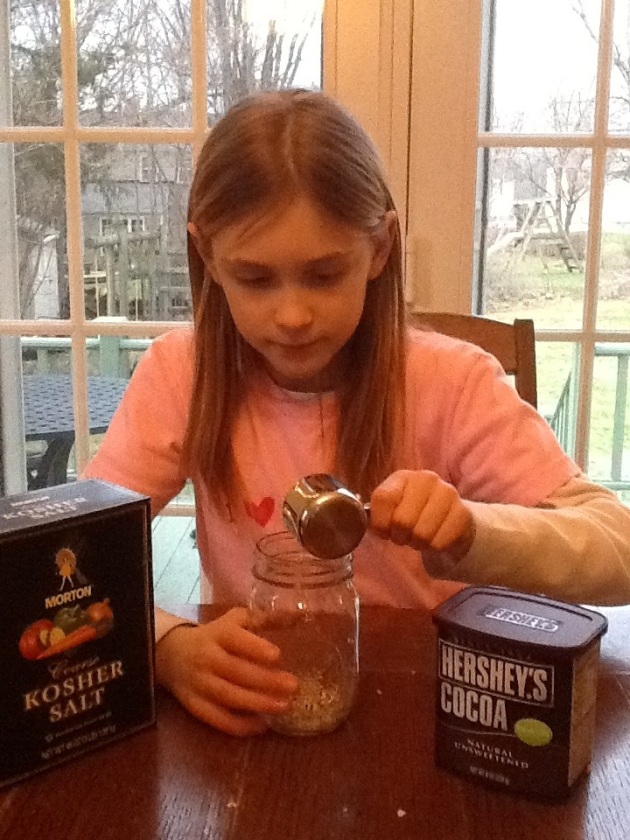
So now the time has finally come. Not only is Katie old enough to climb up onto a chair, she actually knows how to ski down a mountain, multiply by 9’s and conceal sugar packets in her room without her mother’s knowledge (and I only know how to do 2 out of 3 of those things!) My daughter is ready to move on from simply measuring, pouring and stirring. She is ready to chop, slice and peel. Sigh.

So this is how I am teaching her to use knives safely in the kitchen and as with almost everything else on this parenting journey, it is a slow, gradual process. I still look over her shoulder nervously and hover as she chops…but we are getting there…one carrot at a time. And hopefully I will instill good habits that she will always carry with her as she navigates all of the “sharp objects” to come in life.

20130128-214419.jpg

20130128-214446.jpg

Ten Steps To Teaching Your Child to Use a Kitchen Knife Safely:

1. Make sure that your knives are sharp and in good condition. A dull knife is actually more dangerous to use than a sharp one.
2. Start easy. We began by cutting peeled bananas or pieces of watermelon with no rind using a butter knife. Teach them to use the butter knife as if it were a sharp knife to start creating safe habits.
3. When your child is ready to move on to a sharp knife, a paring knife might be easier to use than a larger chef’s knife that an adult would use to chop with.
4. Always use a non slip cutting board.
5. On the hand that is holding the food item, keep your fingertips curled under so that your fingers are not sticking out.
6. Cut in the direction that points the blade away from you.
7. Work slowly and carefully and focus on the task at hand.
8. Whenever possible, do all of your cutting prep work before you start cooking, so that you are not distracted by things on the burner.
9. When you are finished using a knife, put it directly in the dishwasher, blade down, or wash it by hand and put it away. Don’t leave knives lying on the counter or in the sink.
10. Remember that like everything else your child gets good at, they need lots and lots of practice and they need to do it themselves…with you, of course, nervously hovering and hyperventilating right next to them!

3 Comments »

What Kind of Grilled Cheese Does Your Dog Like?

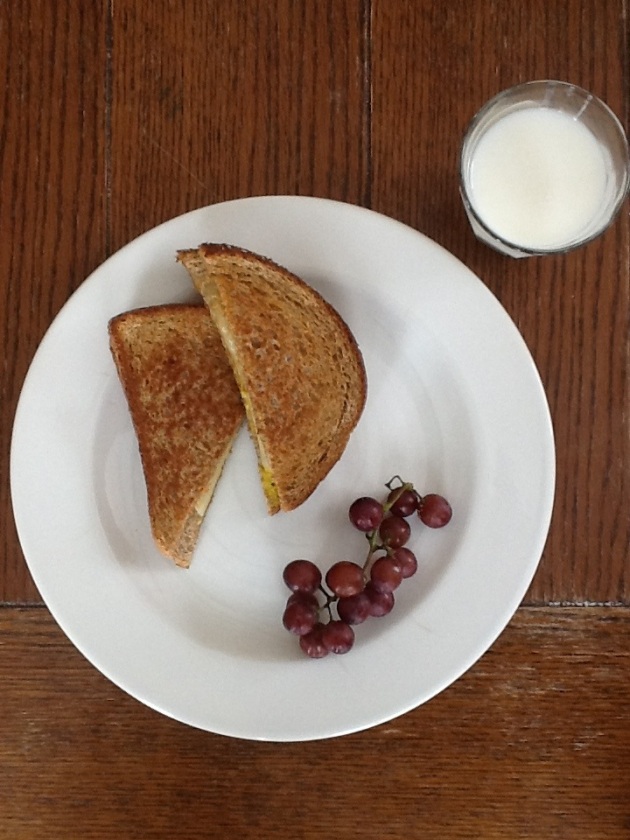
Katie: I love my mom’s grilled cheese! I like when she adds a bit of honey mustard on it. I think it tastes better with the honey mustard. My brother disagrees…he likes his grilled cheese plain. My dog, KC, likes it both ways. How do I know? Because he likes to steal them both. I’d say my second favorite lunch my mom makes is the honey mustard grilled cheese. I hope you like it too!

Debbie: We’re all about the comfort food around here this week. For the past few days the mercury has been fluctuating between 10 below and 10 above freezing. When you are looking forward to it warming up to the teens, you know you need some comfort food on the table! I’m sure most folks don’t need a recipe to know how to make a grilled cheese sandwich, but we’ve included one for any kids trying it for the first time. We also wanted to share some variations on the basic plain cheese sandwich in case you are more adventurous than Katie’s brother!

Grilled Cheese Sandwich

1. Melt a pat of butter in a pan over medium heat.
2. Butter the outsides of two pieces of whole wheat bread.
3. When the butter in the pan has melted, turn the heat down slightly and place one slice of bread in the pan, buttered side down.
4. Add your cheese (and other combination items if using) and top with the second slice of bread, buttered side up.
5. Heat for 3 to 5 minutes until slightly browned, flip the sandwich carefully and heat another 3 to 5 minutes on the other side.
6. Serve with fresh fruit or cherry tomatoes and a pickle (sweet or dill…you choose!)

Other combinations to try:
~cheddar cheese and sliced apples
~Monterey jack cheese, mustard and honey
~mozzarella cheese, sliced tomatoes, basil and a splash of balsamic vinegar
~spinach (sautéed in a little olive oil and garlic until just wilted), Brie cheese (rind removed) and apricot preserves
~pesto and mozzarella or provolone cheese
~Monterey jack or pepper jack cheese and avocado slices
~Camembert cheese (rind removed) and pear slices

20130125-114533.jpg

20130125-114601.jpg

1 Comment »

Buy or Bring?

I try to pack lunches for my kids as much as possible. With all of the bad publicity school lunch gets these days, you almost feel like a bad parent if you don’t. But, I must confess, sometimes the two sweetest words in the English language are “I’ll buy!”. When I hear those two words as I’m dragging gently urging my children out of bed, I know that my morning just got a bit more relaxed. Maybe I will sit down and watch “Martha Speaks” on PBS for a few minutes (secretly, one of my favorite TV shows ever, second only to “Mad Men”). Or maybe I can get some of those decorations off of the Christmas tree (yes, yes, I know it’s MLK day…why can I not get this tree down????). But on the days when I hear “I’ll bring” I have to buckle down and pack those healthy, economical and environmentally friendly lunches. And it’s challenging. Because if I’m going to take the time to pack them lunch, I do want it to be all of those things (or at least 2 out of 3!). If I am just going to throw a few pre-packaged, processed items together…what’s the point? I know that I’m not the only parent that struggles with this. Any trip down the aisles of a grocery store makes this very clear. Go-Gurt, Lunchables, Uncrustables. There is a huge market for convenience lunch items for kids. But we really need to take a closer look at what these time savers are made of.

Luckily, I discovered Lisa Leake’s blog One Hundred Days of Real Food. She is the queen of packing lunch and I have found so much inspiration on her site. One of the best ideas I have gotten from her is the use of Ziploc Divided Lunch Containers. These containers make it so easy to pack a variety of items efficiently without having to use a lot of plastic bags or wash a bunch of smaller containers. They are reusable, BPA free, and dishwasher safe. I’ve been using ours for a year and a half and still have not had to replace them (I have 4 containers and 2 kids). The compartments are individually sealed so food can be kept separate and there is no leaking. We use insulated lunch bags from Target (Embark brand) and the containers just fit inside along with an ice pack.

Head over to Lisa’s site for some amazing ideas along with pictures. If you have not been packing lunch, start small…set a goal to pack a real food lunch once a week and then add on as you can. Make sandwiches on the weekend, freeze them and then dole them out all week. If you pack the frozen sandwich in the morning, it will be thawed out by lunch.

Pictured is one of Katie’s favorite lunches…cream cheese/salsa roll ups, cherry tomatoes and popcorn. And yes, we did finally kick our tree to the curb…just in time to start decorating for Valentine’s Day!

20130122-103624.jpg

20130122-103643.jpg

Some questions for Katie about buy vs. bring…
Mom: So would you rather buy lunch at school or bring a lunch that I packed?
Katie: Buy.
M: (shocked and saddened look on my face) Why is that?
K: Well, because then I don’t have to worry about carrying my lunch bag out and putting it in the bin and then remembering to pick it up from the bin after recess…
M: (relieved look on my face) Oh…I meant the food…which food do you like better?
K: Oh…that depends on what they are serving at lunch.
M: So what is your favorite school lunch?
K: Chicken Tenders.
M: (thinking to myself…she hates any chicken dish that I make!!!) And what is your favorite lunch that I pack?
K: Tomato Soup in a thermos! (See our last post!)

4 Comments »

Cream of Tomato Soup

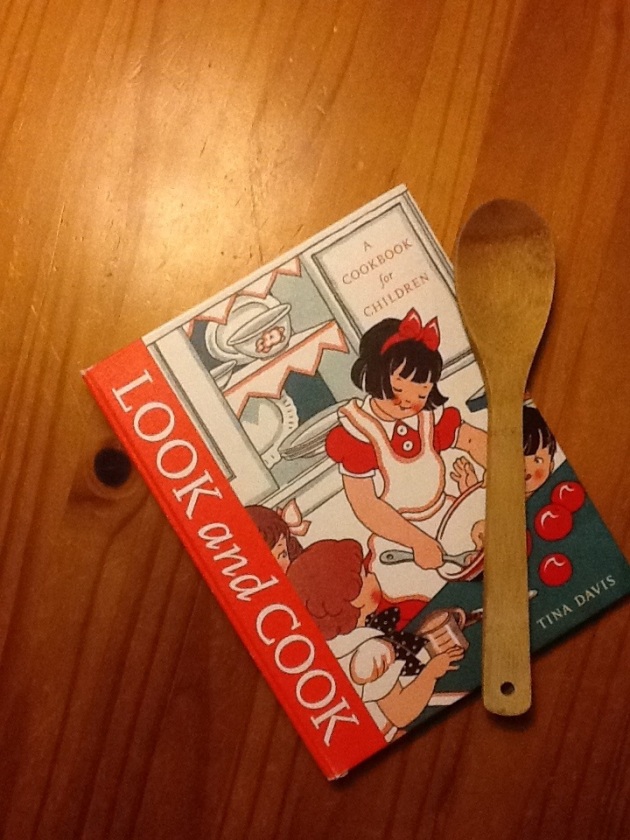
One of the first things Katie learned to cook was tomato soup. This recipe is almost as easy as opening up a can of Campbell’s and is of course much better! Our favorite way to make it is adapted from a recipe in Tina Davis’s cookbook, “Look and Cook “. Katie received this wonderful book from my mother, the Christmas she turned 8. It is filled with simple, nourishing recipes that use ingredients that your grandmother would recognize. The thing that I love the most about this book is the illustrations. Tina includes pictures that were originally in cookbooks from the early 1900’s to the 1960’s. Looking through these pages will make you want to put two braids in your daughter’s hair and send her to school in short white socks and Mary Janes!

Katie: I absolutely love tomato soup! This recipe is my favorite. It is healthy and it’s “real” food. But if you have a dog, watch out! Just about all dogs love this recipe!

CREAM OF TOMATO SOUP (serves 4-6)

1/2 t baking soda
Tomato purée(28 oz. can or 3 cups)
2 T butter
1 small onion, diced
2 cups milk
1 cup light cream
1 bay leaf
1 t salt
3/4 t sugar

1.Pour the tomato purée into a bowl and stir in the baking soda. The mixture will bubble a bit…this helps prevent the cream from curdling when you add it to the tomatoes.
2.Melt your butter over medium heat in a large stock pot or Dutch oven.
3.Saute the onion in the butter for a couple of minutes.
4.Pour in the milk, cream and bay leaf and stir.
5.When the mixture is warm, add the tomatoes, salt and sugar and stir.
6.Continue to stir and heat the soup just until it boils, then remove it from the heat. Discard the bay leaf.

Even better if you have some grilled cheese sandwiches to go along with this!

20130119-203200.jpg

20130119-203220.jpg

1 Comment »

Homemade Hot Cocoa

Almost every weekend in the winter, my husband takes the kids skiing. We usually pack lunches for them and last year, I decided to try sending along hot cocoa in a thermos. Now, of course those Swiss Miss packets are convenient, but with ingredients like corn syrup, hydrogenated oil, and artificial flavor (why do they need to add artificial flavor???) I knew that I wanted to make it myself. After trying a couple of different recipes, I found a combination that is fairly quick and healthy. It does use granulated sugar, but you could probably try using real maple syrup. The skiing portion of my family has given it the thumbs up. It also works after sledding, skating and shoveling snow!

Katie: This hot cocoa is awesome! My Dad takes my brother and me skiing and my Mom makes this for us. After we’re done skiing we have a toast “to a great day of skiing”. You might also like this idea from New Nostalgia’s site. In the past, my brother and I have made it for our teachers.

Homemade Hot Cocoa (makes 4, 8oz. servings)

-1 cup of water

-3 heaping tablespoons unsweetened cocoa ( or 2 squares unsweetened chocolate, 2 oz. each)

-1/4cup sugar

-Dash of salt

-3 cups milk

-1/4 teaspoon of vanilla (optional)

Whisk together the sugar,cocoa powder and salt in a saucepan until their are no lumps.

Add the water and bring to a boil over medium heat, stirring frequently.

Lower the heat and simmer for 3 minutes while stirring.

Add the milk, whisk to combine and bring almost to a boil over medium heat continuing to stir.

Remove from the heat and stir in the vanilla.

20130118-231326.jpg

1 Comment »

Hello!

Hi!

My name is Katie. my mom and I created this blog to show some of our favorite recipes. We changed the original recipe to make it “real food”.  We hope you enjoy the recipes!  – Katie

Hi, I’m Debbie, Katie’s mom.  We love to cook and we have spent a lot of time adapting recipes so that they are easy to make and use as little “processed” ingredients as possible.  So we hope you will be able to use some of the ideas for your family.

6 Comments »